Building a home wall - Artline Holds
What are you looking for ?

Building a home wall

What climber hasn’t dreamt of indulging their passion at home? Especially during lockdown?! - Original text and drawings by Didier Dumont.

News > Building a home wall
French design

What climber hasn’t dreamt of indulging their passion at home?  Especially during lockdown?!  Whether it’s for their own training or to get the kids started, most people can find a good reason for building their own wall!  But if you want to make your dreams come true, there’s going to be some DIY involved (and it doesn’t need to be a nightmare)…  From the Güllich board under the stairs to the climbing wall in the loft or cellar, where there’s a will there’s a way to build a bouldering wall at home!  Read on to find out how!

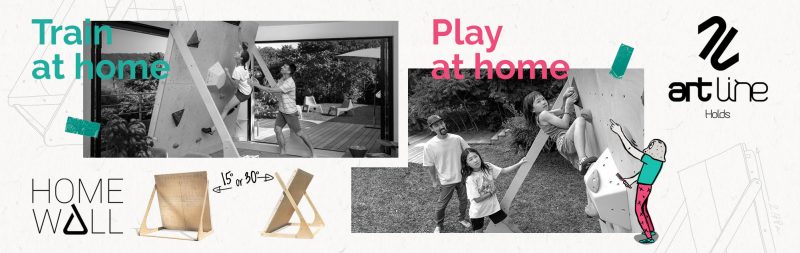
And for those who are definitely not handymen, ArtLine has the solution with the HomeWall, a free-standing wall with an adjustable angle to set at home. No need to be a DIY expert either, it’s as easy to put together as Swedish flatpack furniture:

Is my home suitable?

Whatever the size of what you’re planning to build, you’ll need to find a support structure that’s sufficiently solid.  In fact this is what will determine whether your project is going to be somewhat modest, or pretty ambitious.  You won’t be able to attach the structure to hollow supports such as brick or plasterboard without damaging the wall.  You’ll need to go for more solid materials such as concrete, breezeblocks, stone or wood.

What about the format?

The available surface area, what you intend to use it for (strength, stamina, endurance), your level, the kind of holds you have or plan to buy… all of these things will dictate the profile of your wall.  If you don’t have an expert carpenter on hand to build a complex structure, flat surfaces can be made more interesting by adding volumes, making your wall modular.

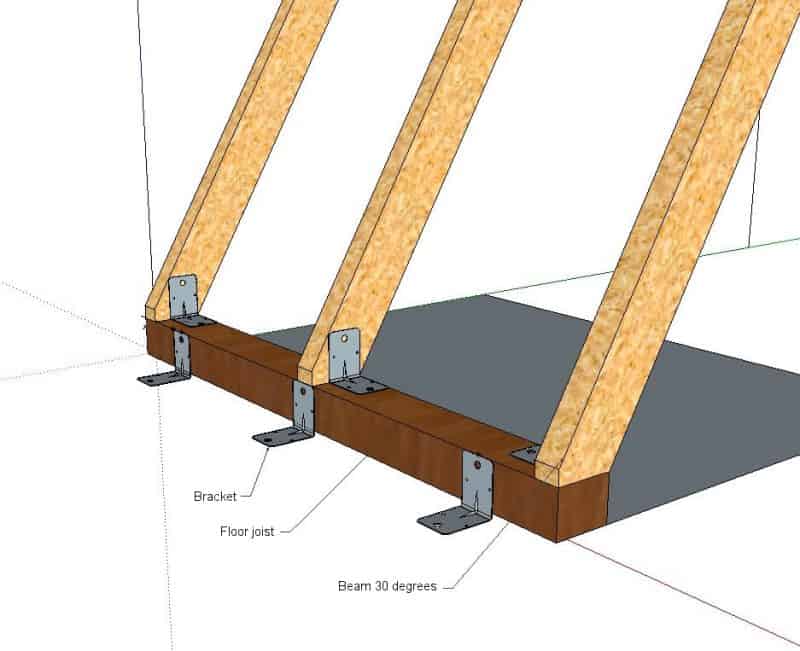
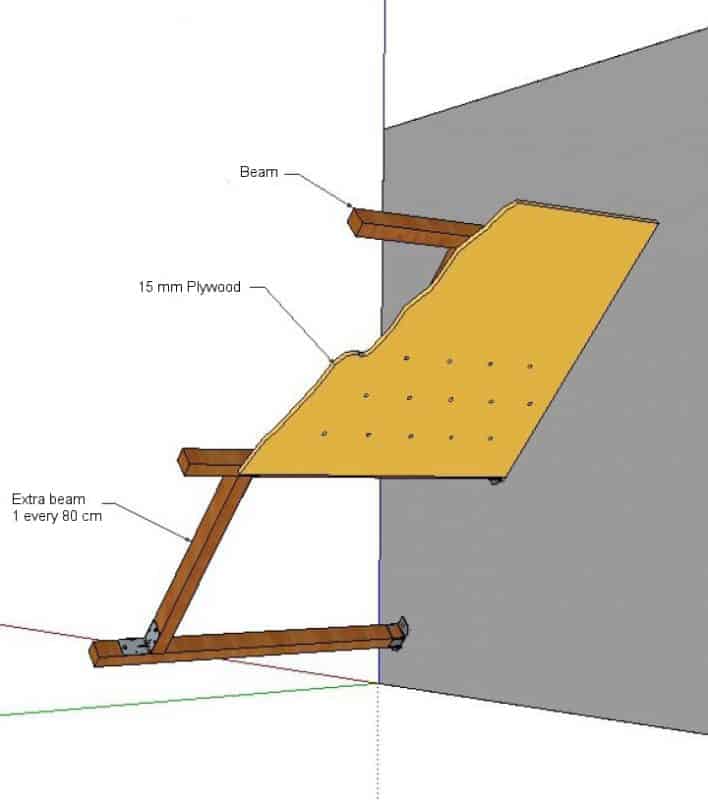
The classics are a 45° incline (takes up a lot of space), a 15/20° incline, vertical panels, and slabs with a 5-7° positive incline.

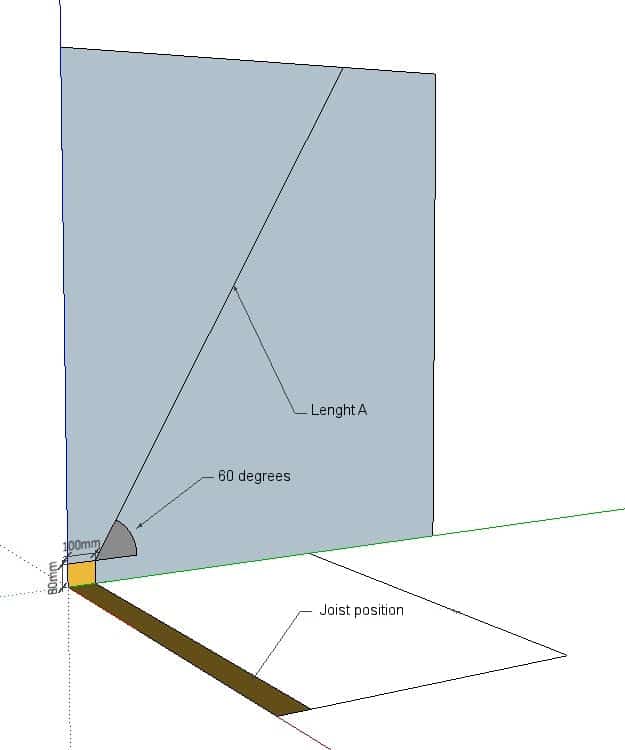
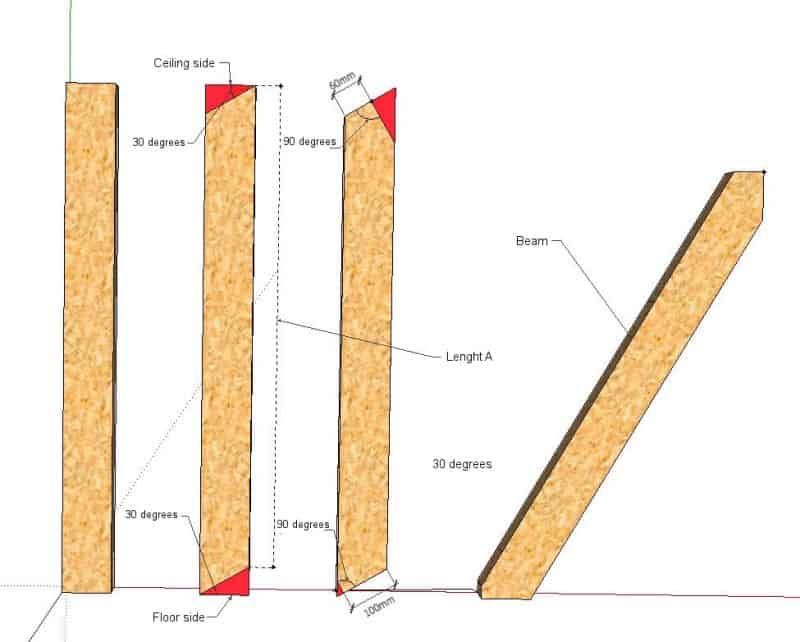
3D design tools like Google Sketchup can help you get an idea of the space you’ll need.  A cardboard model works pretty well too!

What do I need ?

Tools:

  • Power drill/driver
  • 12 mm diameter wood drill bit
  • Saw
  • Hammer
  • Measuring tape
  • Spirit level

Wall structure:

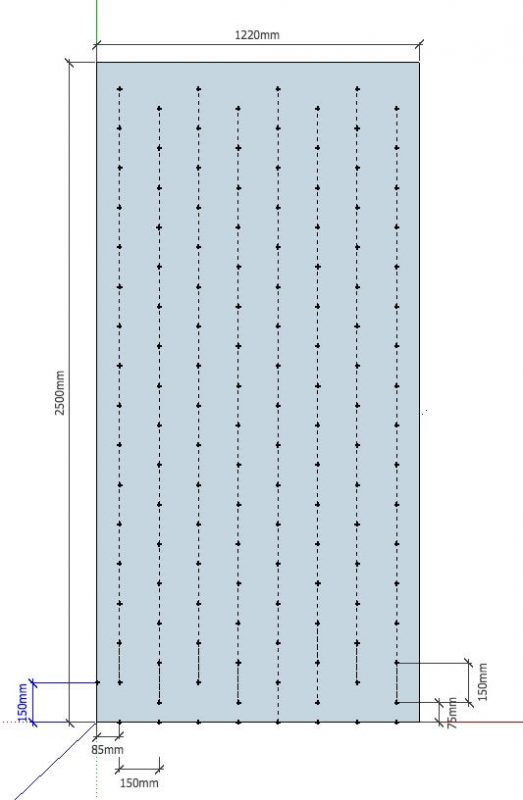
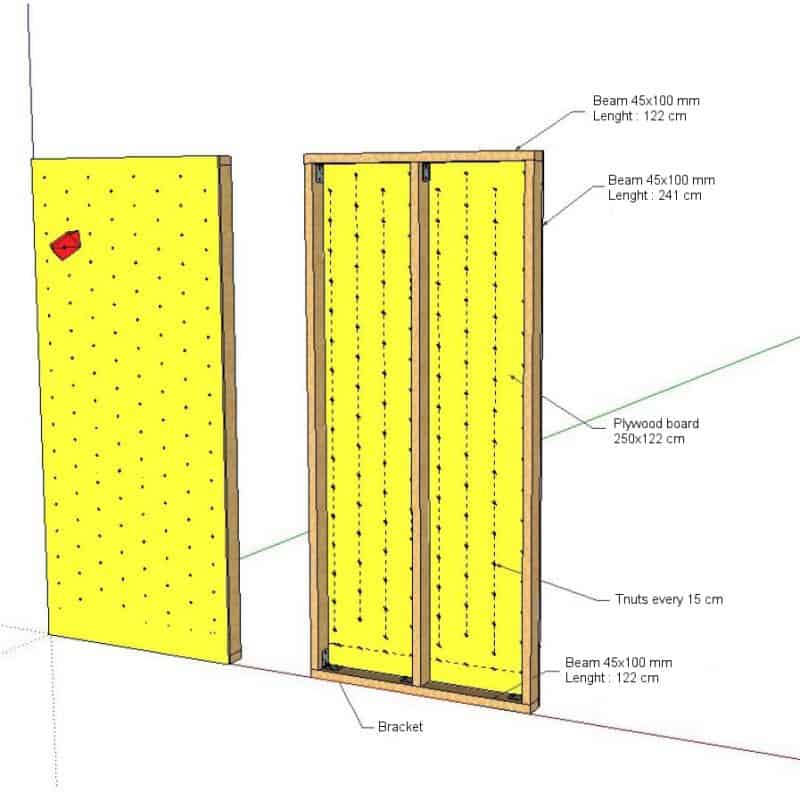
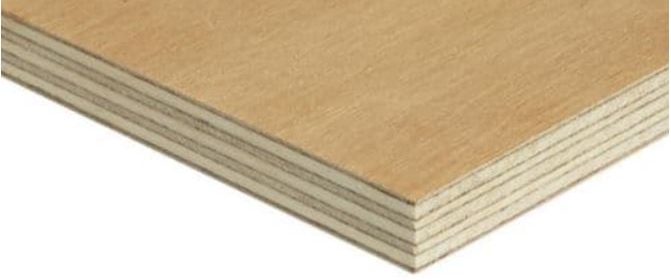
Panels: the most frequently used material is 15 or 18mm plywood, 12mm being too thin for the T-nuts.  It comes in 122 x 210 cm or 150 x 310 cm boards.  Some stores will cut those for you; it’s more expensive, but it can be handy if you don’t have the tools.

Particle boards such as chipboard or OSB are not suitable given the constraints of a climbing wall (T-nut screws get shredded, screw-on holds get pulled out) and keeping them rigid would require a lot of braces, which isn’t very cost-effective.  Painting the panels makes it easier to wash them and get rid of dust and chalk.  Often there won’t be a window, so painting them can help brighten the place up a bit.

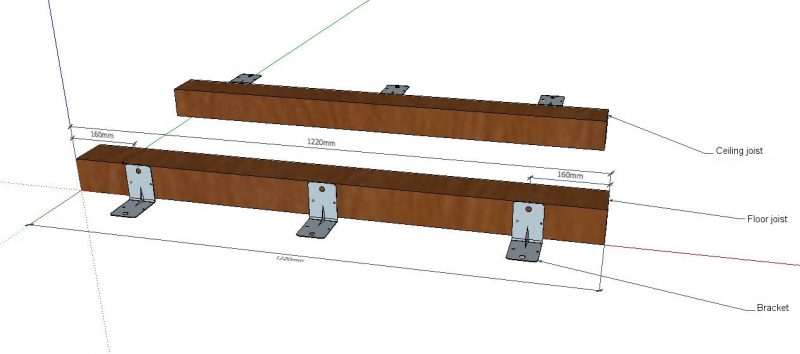
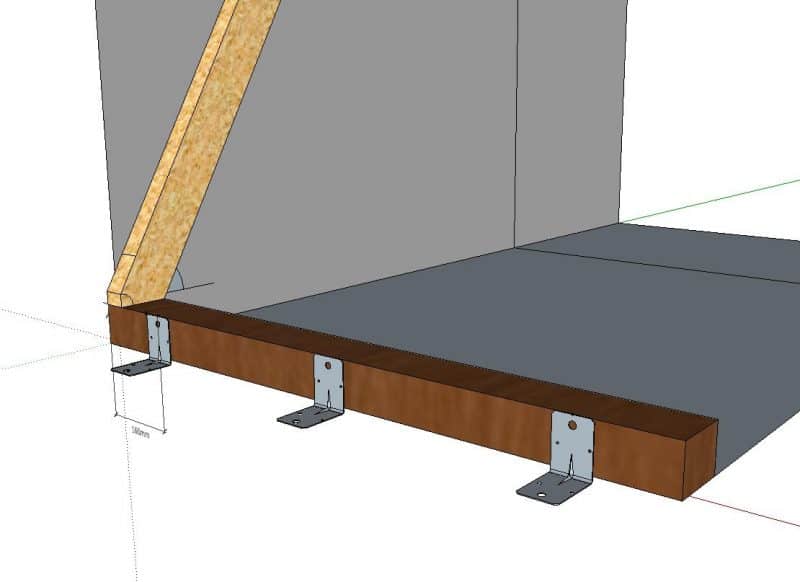
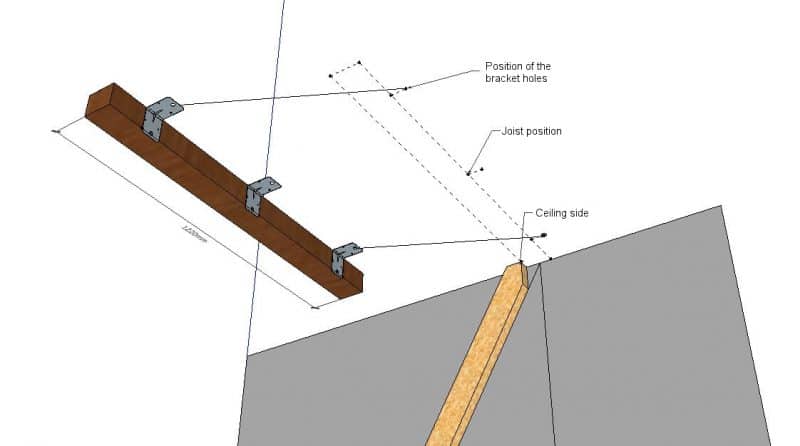
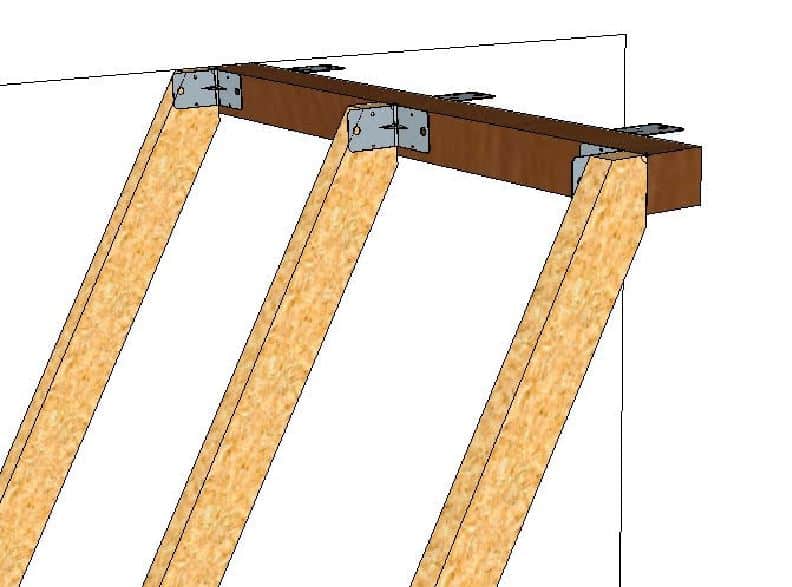
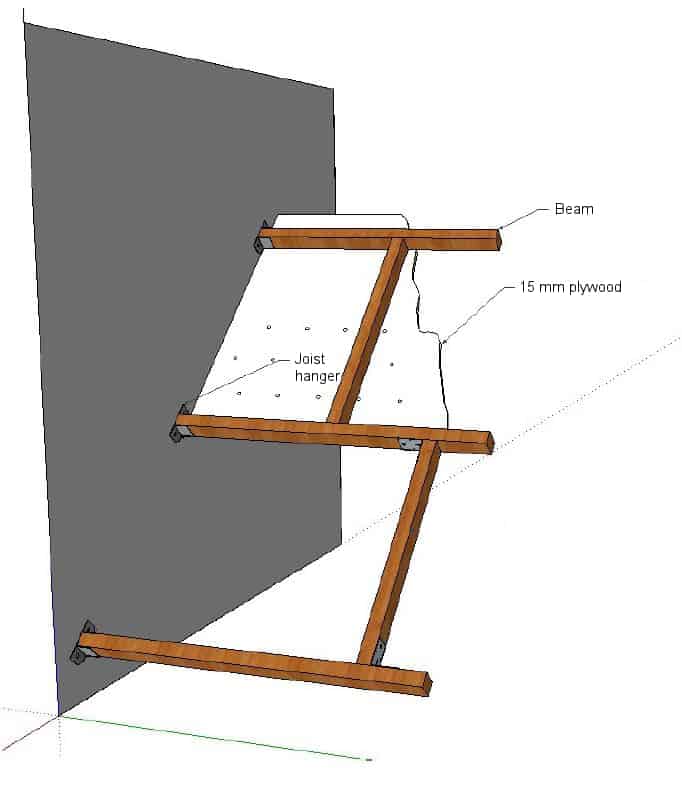
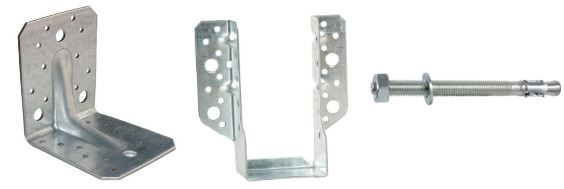
Frame: beams will form the frame: two horizontal joists (floor and ceiling) and several brace beams.  The joists (80 x 100 mm) are made of plain wood and can be found in specialist stores.  The planed brace beams (45 x 100 mm) are available in DIY stores.  To attach the beams to each other, you will need connectors (joist hangers, reinforced angle 1, connecting plates).  These come in sizes to fit the most frequently used pieces of wood.  Different accessories (dowels, expansion bolts, cement, resin…) can be used to fix the frame to the supporting structure depending on what it is made of.

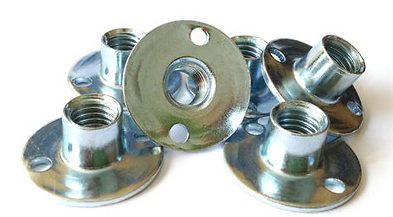
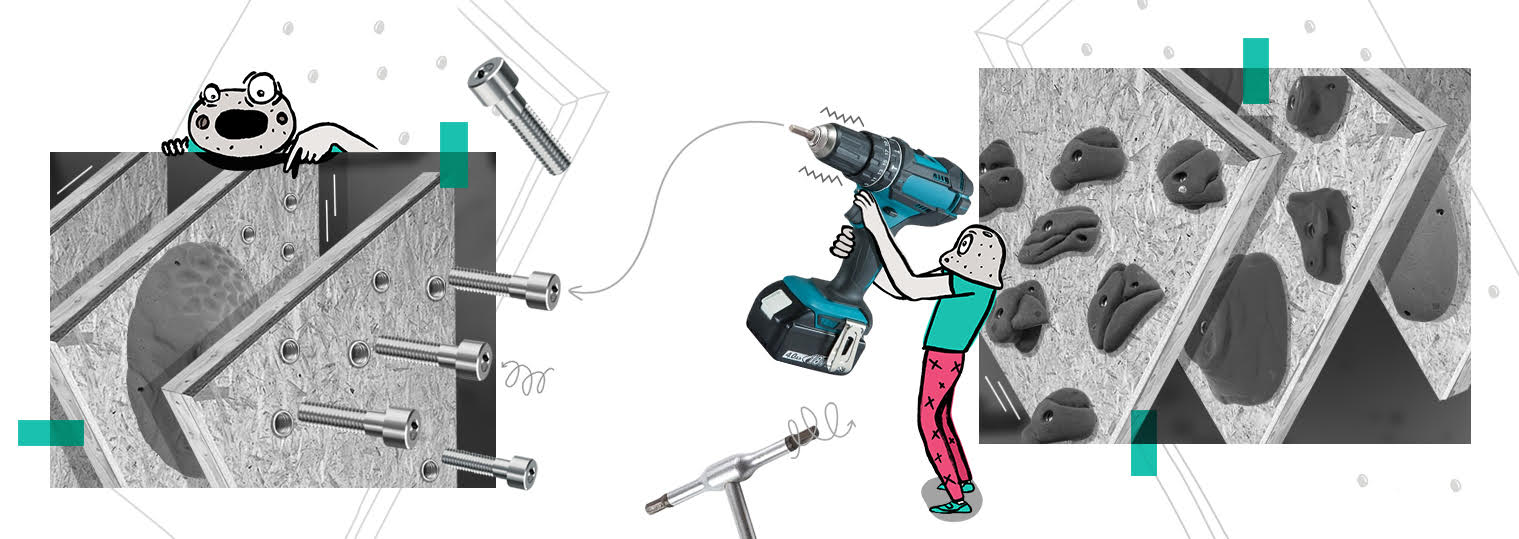
T-nuts: these nuts are inserted from behind the panel and the holds will be screwed into them, using CHC 10 mm screws.  There are two types of T-nut.  Screw-on T-nuts hold up well to power drivers, because of the two small retaining screws.  Pronged T-nuts are easier and quicker to install and they are less expensive.  However they can pop out if they are used intensively or regularly.

Ready to play?

Here we’re going to describe the different steps for building a 30° incline wall.  The structure reaches from floor to ceiling, which usually means a concrete support structure.  We’ll also talk about wall to wall constructions and their specifics.

The dimensions mentioned are for illustration purposes: 2.4m high and 1.2m wide.  We’re using reinforced angle brackets to attach the beams, but there are other methods out there, depending on the support structure.


Step 1:

Draw out the position of your joist on the floor, allowing an offset for the brackets.  Trace the angle from the top of the joist to the ceiling.

Step 2:

Cut the joists to the required length.  Screw the brackets to the joists.  Anchor the first joist to the floor.

Step 3:

Draw the cuts on the brace beams then cut to length A, making sure to saw the corners as shown below.

Step 4:

Place the sawn brace beam against the wall and determine the position of the ceiling joist.

Mark the screw holes for the brackets.  Place the brace beam against the drawn line to check markings, then attach the joist to the ceiling.

Step 5:

Trace the position of the brace beams on the joists.  Screw the brackets to the joists.  Finish cutting the brace beams and screw them to the joists on the floor and ceiling.

Step 6:

First draw out the grid in a square, triangular or random pattern.  Use 15 x 15 cm spacing (around 50 T-nuts / m²) or 20 x 20 cm.  This will provide you with quite a ‘busy’ wall.  If your panel is small, you can drop the spacing down to 10 x 10 cm.  Screw-on holds can be used to ‘fill the gaps’ if required.  Make sure the brace beams aren’t behind the holes, and keep at least 10cm away from the edges.  Drill 12mm holes, remembering to drill as vertically as possible otherwise it will make screwing on the holds more difficult.  You need to use a wood drill bit that’s in good condition. Put a piece of wood under the plywood at the point where you are drilling, to avoid splitting the wood as you come through to the other side.

Place the T-nuts in the holes, giving them a tap with a hammer if necessary.  Then fix them with 2 retaining woodscrews per T-nut, taking care to use the right length of screw for your board’s thickness.  Take care not to exert any force when the screw meets the T nut, otherwise the screw shreds the board and weakens it.  You might want to have a couple of dry runs so you can set the driver to a speed that works for you.

Step 7:

Draw the line of the brace beams on the visible side.  Screw the panel into the brace beams (4.5 x 50 wood screws every 20 cm).

Wall to wall

If your walls are stronger than your floor or ceiling and it makes more sense to use them for your support structure, here is a construction between two walls.  The different steps are pretty much the same, except you will use joist hangers to connect the frame to the walls.


What do I need for a child’s wall?

To create a vertical wall that is 1.2m wide and goes up to the ceiling (2.5m in the example):

  • 2 lengths of wood for the frame, cross section 45 x 100 mm, length 120 cm.
  • 3 lengths of wood for the frame, cross section 45 X 100 mm, length = (ceiling height – 90 mm)
  • 6 reinforced brackets: 80 x 80 x 60 mm
  • A plywood board: 122 x 250 cm x 15 mm thick (cut to 122 x 125 for transport purposes if required)
  • 125 T-nuts
  • 4 x 50 woodscrews
  • Anchors to attach the structure to your wall or floor.

Finally…

Get those holds on and get climbing!